* Aprire di nuovo <code>Storage -> Fulltext Catalogs -> nopCommerceFullTextCatalog</code>, nella tab ''General'' inserire come ''Owner'' => '''wmuser'''
* Aprire di nuovo <code>Storage -> Fulltext Catalogs -> nopCommerceFullTextCatalog</code>, nella tab ''General'' inserire come ''Owner'' => '''wmuser'''
* Aprire di nuovo <code>Storage -> Fulltext Catalogs -> nopCommerceFullTextCatalog</code>, nella tab ''Tables/Views'', pannello ''Eligible columns'' impostare '''italian''' per tutti i campi
* Aprire di nuovo <code>Storage -> Fulltext Catalogs -> nopCommerceFullTextCatalog</code>, nella tab ''Tables/Views'', pannello ''Eligible columns'' impostare '''italian''' per tutti i campi
* Creazione dei sinonimi: <syntaxhighlight lang="sql">CREATE SYNONYM [dbo].[Db_NopMapping_Occasioni] FOR [_Designbest].[dbo].[NopMapping_Occasioni]
CREATE SYNONYM [dbo].[TP_Occasioni] FOR [_Trovaprodotti].[dbo].[Occasioni]</syntaxhighlight>
* Dalle proprietà del progetto ''Nop.Web'' andare sulla tab ''Build'', selezionare la configurazione ''Release'' e aggiungere il simbolo condizionale '''OFFICIAL'''
* Dalle proprietà dei progetti
** ''Nop.Web''
**''Nop.Data''
** ''Not.Services''<br/> andare sulla tab ''Build'', selezionare la configurazione ''Release'' e aggiungere il simbolo condizionale '''OFFICIAL'''
* Configuriamo l'applicazione in modo che cambi file di configurazione a seconda della Solution Configuration selezionata
* Configuriamo l'applicazione in modo che cambi file di configurazione a seconda della Solution Configuration selezionata
** In <code style="color:red;font-weight:bold;">Libraries\Nop.Data\NopDataSettingsDefaults.cs</code> cambiare l'assegnamento di '''FilePath''' con quanto segue <syntaxhighlight lang="c#"> public static string FilePath =>
** In <code style="color:red;font-weight:bold;">Libraries\Nop.Data\NopDataSettingsDefaults.cs</code> cambiare l'assegnamento di '''FilePath''' con quanto segue <syntaxhighlight lang="c#"> public static string FilePath =>
Riga 88:
Riga 93:
* Inserimento di '''UsoUtilitiesController''' uguale a quello precedente con la differenza che le chiamate a services sono diventate tutte ASYNC e perciò il trucco è aggiungere al fondo <code>.Result</code> per le variabili o <code>.Wait()</code> per i metodi come ad esempio <syntaxhighlight lang="c#">Customer customer = _customerService.GetCustomerByGuidAsync(customerGuid).Result;
* Inserimento di '''UsoUtilitiesController''' uguale a quello precedente con la differenza che le chiamate a services sono diventate tutte ASYNC e perciò il trucco è aggiungere al fondo <code>.Result</code> per le variabili o <code>.Wait()</code> per i metodi come ad esempio <syntaxhighlight lang="c#">Customer customer = _customerService.GetCustomerByGuidAsync(customerGuid).Result;
Cambiare le regole di rewrite, i '''prodotti''' sotto <code>/catalogo-prodotti</code> , le '''categorie''' sotto <code>/catalogo</code> e i '''cataloghi''' sotto <code>/brand</code>
Modificare in <code>Nop.Web\Infrastructure\GenericUrlRouteProvider.cs</code>
<syntaxhighlight lang="c#">
using Microsoft.AspNetCore.Builder;
using Microsoft.AspNetCore.Routing;
using Nop.Data;
using Nop.Web.Framework.Mvc.Routing;
namespace Nop.Web.Infrastructure {
/// <summary>
/// Represents provider that provided generic routes
/// </summary>
public partial class GenericUrlRouteProvider : BaseRouteProvider, IRouteProvider {
defaults: new { controller = "Catalog", action = "ProductsByTag" });
}
#endregion
#region Properties
/// <summary>
/// Gets a priority of route provider
/// </summary>
/// <remarks>
/// it should be the last route. we do not set it to -int.MaxValue so it could be overridden (if required)
/// </remarks>
public int Priority => -1000000;
#endregion
}
}
</syntaxhighlight>
=== Prodotto ===
=== Prodotto ===
Riga 190:
Riga 306:
</div>
</div>
}
}
</syntaxhighlight>
=== Integrazione di 4Dem ===
All'interno della action ''SubscribeNewsletter'' di <code>Presentation\Nop.Web\Controllers\NewsletterController.cs</code> aggiungiamo la chiamata alle API di 4Dem per registrare il cliente nella nostra lista.
Sembra che nella backoffice non ci sia la gestione dei '''meta title''' e '''description''' per le pagine HP e HP-Cataloghi.<br/>
Modificare la vista <code>Presentation\Nop.Web\Themes\Pacific\Views\Shared\_Root.Head.cshtml</code> commentando i meta title e description e sostituendo questo
<title>Designbest Shop | L'e-commerce del design</title>
<meta name="description" content="Il meglio del design è in offerta su Shop Designbest: trova l'arredamento per la tua casa e acquista a prezzi scontati e con pronta consegna." />
}
else if (currentpage.EndsWith("/manufacturer/all")) {
<title>Designbest Shop | I cataloghi dei migliori brand</title>
<meta name="description" content="I prodotti delle migliori marche sono in offerta su Shop Designbest. Sfoglia i cataloghi di arredamento e finiture d’interni e acquista a prezzi scontati." />
Per cambiare l'immagine in alto a sinistra bisogna sovrascriverla qui <code>P:\DesignbestCommerce3\Presentation\Nop.Web\wwwroot\css\admin\images</code> per 2 versioni del menu(compatto e non) <code>logo.png 250x57</code> e <code>logo-mini.png</code>
==== Home - Vendor ====
==== Home - Vendor ====
* Nascondere il pulsante ''Visualizza'' nei best seller(un Vendor non deve entrare nella pagina di modifica del prodotto lato NOP), bisogna commentare l'ultima <code>ColumnProperty</code> in queste 2 viste:
* Nascondere il pulsante ''Visualizza'' nei best seller(un Vendor non deve entrare nella pagina di modifica del prodotto lato NOP), bisogna commentare l'ultima <code>ColumnProperty</code> in queste 2 viste:
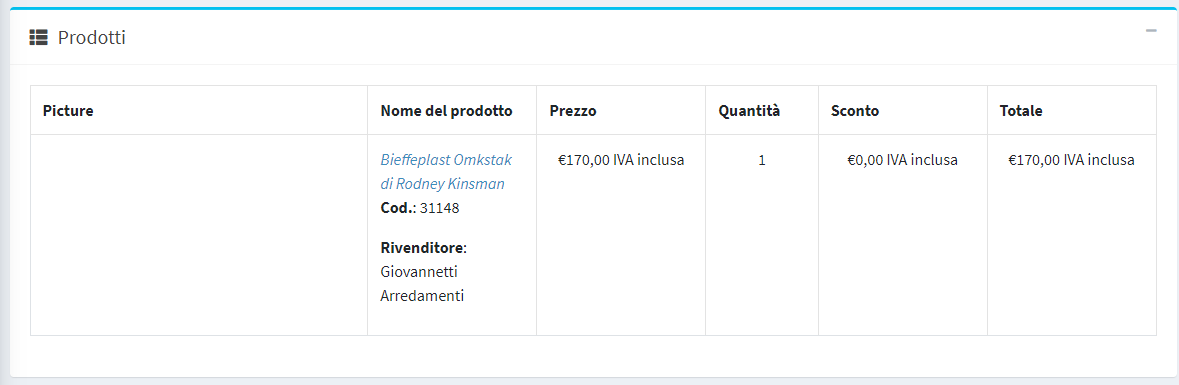
* Nel box dove sono elencati i prodotti, il link del prodotti rimanderà alla scheda del prodotto nel frontend, mentre solo se siamo Admin entreremo nell'edit del prodotto di NOP
* Nel box dove sono elencati i prodotti, il link del prodotti rimanderà alla scheda del prodotto nel frontend, mentre solo se siamo Admin entreremo nell'edit del prodotto di NOP [[File:Nop440_ordine_prodotti.PNG|center]] modificare in <code>Nop.Web\Areas\Admin\Views\Order\_OrderDetails.Products.cshtml</code>
[[File:Esempio.jpg]]
** Dobbiamo recuperare il VendorID del dropship di Webmobili: <syntaxhighlight lang="c#">
modificare in <code>Nop.Web\Areas\Admin\Views\Order\_OrderDetails.Products.cshtml</code>
**Dobbiamo recuperare il VendorID del dropship di Webmobili:
** Controllo se l'utente è un Vendor o Admin <syntaxhighlight lang="c#">
**Controllo se l'utente è un Vendor o Admin
<syntaxhighlight lang="c#">
<em>
<em>
@if (!Model.IsLoggedInAsVendor) {
@if (!Model.IsLoggedInAsVendor) {
Riga 242:
Riga 396:
}</em>
}</em>
</syntaxhighlight>
</syntaxhighlight>
** Se il vendorID è quello di Webmobili-dropship mostro il pulsante '''CLONA e ASSEGNA a RIVENDITORE'''. Attenzione il metodo è cambiato da code>prodService.GetProductById(item.ProductId).VendorId</code> a <code>GetProductByIdAsync</code>: <syntaxhighlight lang="c#">
**Se il vendorID è quello di Webmobili-dropship mostro il pulsante '''CLONA e ASSEGNA a RIVENDITORE'''.
Attenzione il metodo è cambiato da <code>prodService.GetProductById(item.ProductId).VendorId</code> a <code>GetProductByIdAsync</code>:
<syntaxhighlight lang="c#">
@{
@{
var productById = await prodService.GetProductByIdAsync(item.ProductId);
var productById = await prodService.GetProductByIdAsync(item.ProductId);
Riga 256:
Riga 407:
}
}
</syntaxhighlight>
</syntaxhighlight>
** Il pulsante '''CLONA e ASSEGNA a RIVENDITORE''' apre un modale in cui selezionare il rivenditore, innanzitutto dobbiamo creare la vista/componente del modale '''ProductToVendorModal'''
** Il pulsante '''CLONA e ASSEGNA a RIVENDITORE''' apre un modale in cui selezionare il rivenditore, innanzitutto dobbiamo creare la vista/componente del modale ''ProductToVendorModal'''. <br/>Creiamo il componente in <code>Nop.Web\Areas\Admin\Components\ProductToVendorModal.cs</code> così: <syntaxhighlight lang="c#">
using Microsoft.AspNetCore.Mvc;
using System;
using System.Collections.Generic;
using System.Linq;
using System.Threading.Tasks;
using Nop.Web.Framework.Components;
using Microsoft.Extensions.Configuration;
using Nop.Services.Vendors;

namespace Nop.Web.Areas.Admin.Components {
  public class ProductToVendorModal : NopViewComponent {
    private readonly IVendorService _vendorService;
    private readonly IConfiguration _configuration;

    public ProductToVendorModal(IVendorService vendorService, IConfiguration configuration) {
      _vendorService = vendorService;
      _configuration = configuration;
    }

    public IViewComponentResult Invoke() {
      int dropshippingVendorId = 0;
      int.TryParse(_configuration.GetSection("WMApplicationSettings")["DropshipVendorID"], out dropshippingVendorId);

      var vendorList = _vendorService.GetAllVendorsAsync().Result
        .Where(c => c.Id != dropshippingVendorId)
        .OrderBy(o => o.Name).ToList();

      return View(vendorList);
    }
  }
}
</syntaxhighlight>
Creiamo la cartella e la vista del componente in <code>Nop.Web\Areas\Admin\Views\Shared\Components\ProductToVendorModal\Default.cshtml</code> così:
<li>segnato come non pubblicato, ma sarà cmq visibile dal pannello di gestione del Rivenditore;</li>
<li>segnato con quantita' di pezzi a 0 (al prodotto clonato, non all'originale).</li>
</ul>
</div>
</div>
<div class="modal-footer">
<button type="submit" class="btn btn-primary">
CLONA E ASSEGNA IL PRODOTTO
</button>
</div>
</div>
</form>
</div>
</div>
</div>
</syntaxhighlight>
Torniamo nella pagina contenitore di dettaglio dell'ordine in <code>Nop.Web\Areas\Admin\Views\Order\Edit.cshtml</code> e inseriamo al fondo la chiamata al nostro component modale appena creato con questa riga di codice:
"%Order.VendorDetail(s)%" // custom token by Webmobili
});</syntaxhighlight>
Nel metodo '''AdOrderTokensAsync''' aggiungere la riga <syntaxhighlight lang="c#">tokens.Add(new Token("Order.VendorDetail(s)", await VendorDetailsAsync(order, languageId), true)); // custom token by Webmobili</syntaxhighlight>
E creare tutto il metodo '''VendorDetailsAsync''' <syntaxhighlight lang="c#">/// <summary>
/// Custom by Webmobili
/// </summary>
/// <param name="order"></param>
/// <param name="languageId"></param>
/// <returns></returns>
protected virtual async Task<string> VendorDetailsAsync(Order order, int languageId) {
sb.AppendLine($"<td style=\"padding: 0.6em 0.4em;text-align: left;\">{vendor.Name}, a breve riceverai l'informazione del negozio di riferimento per il tuo ordine.<br/>Email: <a href=\"mailto:{vendor.Email}\">{vendor.Email}</a> \t Telefono: {address.PhoneNumber}</td>");
}
sb.AppendLine("</tr>");
}
sb.AppendLine("</table>");
return sb.ToString();
}
#endregion</syntaxhighlight>
Nella '''WriteTotalsAsync''' aggiungere il parametro opzionale ''int vendorId = 0'' e una region iniziale <syntaxhighlight lang="c#">protected virtual async Task WriteTotalsAsync(Order order, Language language, StringBuilder sb, int vendorId = 0) {
#region Costi spedizione per negozio e sconto sul totale
if (vendorId != 0) {
order.OrderSubtotalInclTax = 0;
order.OrderSubtotalExclTax = 0;
order.OrderShippingInclTax = 0; // azzero perché lo calcolo parziale per il vendor selezionato
order.OrderShippingExclTax = 0;
order.OrderTotal = 0;
var orderItems = await _orderService.GetOrderItemsAsync(order.Id);
foreach (var ord in orderItems) {
var product = await _productService.GetProductByIdAsync(ord.ProductId);
if (product.VendorId == vendorId) {
if (order.CustomerTaxDisplayType == TaxDisplayType.IncludingTax) {
Nella '''ProductListToHtmlTableAsync(Order order, int languageId, int vendorId)''' modificare la chiamata alla '''WriteTotalAsync''' passando anche il ''vendorId''. Togliere ''if(vendorId == 0)'' come di seguito <syntaxhighlight lang="c#">//if (vendorId == 0)
//{
//we render checkout attributes and totals only for store owners (hide for vendors)
if (!string.IsNullOrEmpty(order.CheckoutAttributeDescription)) {
Con il '''dropshipping''' si rende necessario aggiungere un nuovo template di messaggi.
In <code style="color:red;font-weight:bold">Libraries\Nop.Core\Domain\Messages\MessageTemplateSystemNames.cs</code> aggiungere il nuovo nome (dopo ''OrderPaidCustomerNotification'') <syntaxhighlight lang="c#">#region Webmobili
/// <summary>
/// Represents system name of notification customer about paid order after a dropshipping sale.
/// </summary>
public const string OrderPaidDropshipCustomerNotification = "OrderPaid.DropShipCustomerNotification";
#endregion
</syntaxhighlight>
Per creare la logica di spedizione, prima aggiungiamo il metodo nell'interfaccia in <code style="color:red;font-weight:bold">Libraries\Nop.Services\Messages\IWorkflowMessageService.cs</code> (dopo ''SendOrderPaidCustomerNotification'') <syntaxhighlight lang="c#">#region WEBMOBILI
/// <summary>
/// Sends an order paid notification to a customer after a dropshipping sale.
/// </summary>
/// <param name="order">Order instance</param>
/// <param name="languageId">Message language identifier</param>
/// <param name="attachmentFileName">Attachment file name. If specified, then this file name will be sent to a recipient. Otherwise, "AttachmentFilePath" name will be used.</param>
/// <returns>Queued email identifier</returns>
Task<IList<int>> SendOrderPaidDropshipCustomerNotificationAsync(Order order, int languageId,
e l'implementazione in <code style="color:red;font-weight:bold">Libraries\Nop.Services\Messages\WorkflowMessageService.cs</code> <syntaxhighlight lang="c#">
#region WEBMOBILI
public virtual async Task<IList<int>> SendOrderPaidDropshipCustomerNotificationAsync(Order order, int languageId,
A questo punto è necessario aggiungere via SQL il messaggio (comprensivo di token) alla tabella '''MessageTemplate''' <syntaxhighlight lang="sql">INSERT INTO [MessageTemplate]([Name],[BccEmailAddresses],[Subject],[Body],[IsActive],[DelayBeforeSend],[DelayPeriodId],[AttachedDownloadId],[EmailAccountId],[LimitedToStores])
VALUES ('OrderPaid.DropShipCustomerNotification',NULL,'%Store.Name% | Pagamento effettuato per l''ordine #%Order.OrderNumber%','Compilare il BODY',1,NULL,0,0,1,0)</syntaxhighlight>
'''Lato admin''' è necessario modificare il controller <code>Presentation\Nop.Web\Areas\Admin\Controllers\OrderController.cs</code> in modo che chiami la nuova funzione quando necessario.
Aggiungere i seguenti Services:
* ICopyProductService
* IVendorService
* LocalizationSettings
Dopo il metodo(AddProductToOrderDetails), aggiungere:
<syntaxhighlight lang="c#">
#region DROPSHIPPING
public virtual async Task<IActionResult> CopyAndSetProductWMtoVendor(int productId, int vendorId, int orderItemId) {
if (!await _permissionService.AuthorizeAsync(StandardPermissionProvider.ManageProducts))
return AccessDeniedView();
var orderId = 0;
//var copyModel = new CopyProductModel { CopyImages = true, Published = false, Name = "prodotto_" + productId }; //model.CopyProductModel;
try {
var originalProduct = await _productService.GetProductByIdAsync(productId);
// Clonazione prodotto dell'ordine
var newProduct = await _copyProductService.CopyProductAsync(originalProduct, originalProduct.Name, false,
#if DEBUG
false
#else
true
#endif
); // false = publish, true = copyImages
newProduct.Sku = originalProduct.Sku + "-" + newProduct.Id; // nuovo SKU con presiffo del prodotto originale
newProduct.Name = originalProduct.Name + " #";
newProduct.StockQuantity = 0;
newProduct.VisibleIndividually = true;
newProduct.VendorId = vendorId; // aggiorniamo il Vendor a quello scelto dalla tendina
Per aggiungere i link a Designbest e al Magazine modificare la vista <code>\Plugins\Nop.Plugin.Compiled\SevenSpikes.Nop.Plugins.MegaMenu\Views\Components\MegaMenu\MegaMenu.cshtml</code> aggiungendo all'elemento <syntaxhighlight lang="html"><ul class='mega-menu-responsive @menu.CssClass'></syntaxhighlight> gli elementi <code>li</code>:
'''Payments.CheckMoneyOrder''' (da Configurazione/Plugins Locali) il ''nome amichevole'' del plugin viene utilizzato in message template delle email, si rende necessario modificare il nome con l'esatta stringa<br/><br/>
<code>Bonifico Bancario</code><br/><br/>
[[File:MoneyCheckPlugin.jpg]]
== Sul Server ==
È necessario installare '''.NET 5.0''' (che è la successiva di .NET Core 3.1) , la versione '''Hosting Bundle''' da https://dotnet.microsoft.com/download/dotnet/5.0
Creare un dump del database di produzione (Nop 4.3)
Ripristinarlo
Per ripristinare l'utente wmuser è necessario disassociarlo dal catalogo fulltext
Da SQL Management Aprire Storage -> Fulltext Catalogs -> nopCommerceFullTextCatalog, nella tab General impostare come Owner => dbo
Eliminare l'utente wmuser
Ri-mappare l'utente wmuser sul database nuovo
Aprire di nuovo Storage -> Fulltext Catalogs -> nopCommerceFullTextCatalog, nella tab General inserire come Owner => wmuser
Aprire di nuovo Storage -> Fulltext Catalogs -> nopCommerceFullTextCatalog, nella tab Tables/Views, pannello Eligible columns impostare italian per tutti i campi
Addare alla Solution (cartella Libraries) i progetti GenericUtilites, WM4Search, WM_Core e USO
Runnando la Solution dovrebbe partire con tutti i plugin disabilitati. Una volta entrati in admin è possibile vederli dall'elenco e installarli.
Non ci saranno tutti i plugin, in tal caso cliccare su ricaricare la lista di plugin, la soluzione si chiuderà da sola, ma al successivo login la lista dovrebbe essere aggiornata.
Aggiornare tutti i pacchetti nuGet della Solution che abbiano un update minor (dalla seconda cifra in poi)
Creazione di IWMCoreModelFactory per le chiamate alla WMCore.
INTERFACCIA: creare Presentation\Nop.Web\Factories\IWMCoreModelFactory.cs così
BINDING: comunicare la sua esistenza al framework modificando Presentation\Nop.Web\Startup.cs aggiungendo una riga a ConfigureServices() così
publicvoidConfigureServices(IServiceCollectionservices){// aggiunta di IWMCoreModelFactoryservices.AddSingleton<IWMCoreModelFactory,WMCoreModelFactory>();services.ConfigureApplicationServices(_configuration,_webHostEnvironment);}
Inserimento di UsoUtilitiesController uguale a quello precedente con la differenza che le chiamate a services sono diventate tutte ASYNC e perciò il trucco è aggiungere al fondo .Result per le variabili o .Wait() per i metodi come ad esempio
Cambiare le regole di rewrite, i prodotti sotto /catalogo-prodotti , le categorie sotto /catalogo e i cataloghi sotto /brand
Modificare in Nop.Web\Infrastructure\GenericUrlRouteProvider.cs
usingMicrosoft.AspNetCore.Builder;usingMicrosoft.AspNetCore.Routing;usingNop.Data;usingNop.Web.Framework.Mvc.Routing;namespaceNop.Web.Infrastructure{/// <summary>/// Represents provider that provided generic routes/// </summary>publicpartialclassGenericUrlRouteProvider:BaseRouteProvider,IRouteProvider{#region Methods/// <summary>/// Register routes/// </summary>/// <param name="endpointRouteBuilder">Route builder</param>publicvoidRegisterRoutes(IEndpointRouteBuilderendpointRouteBuilder){varlang=GetLanguageRoutePattern();#region WEBMOBILIstringconstProducts="catalogo-prodotti";stringconstCategories="catalogo";stringconstManufacturers="brand";#endregion//default routes//these routes are not generic, they are just default to map requests that don't match other patterns, //but we define them here since this route provider is with the lowest priority, to allow to add additional routes before themif(!string.IsNullOrEmpty(lang)){endpointRouteBuilder.MapControllerRoute(name:"DefaultWithLanguageCode",pattern:$"{lang}/{{controller=Home}}/{{action=Index}}/{{id?}}");}endpointRouteBuilder.MapControllerRoute(name:"Default",pattern:"{controller=Home}/{action=Index}/{id?}");if(!DataSettingsManager.IsDatabaseInstalled())return;//generic routesvargenericPattern=$"{lang}/{{SeName}}";#region WEBMOBILIendpointRouteBuilder.MapDynamicControllerRoute<SlugRouteTransformer>(constProducts+"/{SeName}");endpointRouteBuilder.MapDynamicControllerRoute<SlugRouteTransformer>(constCategories+"/{SeName}");endpointRouteBuilder.MapDynamicControllerRoute<SlugRouteTransformer>(constManufacturers+"/{SeName}");#endregionendpointRouteBuilder.MapDynamicControllerRoute<SlugRouteTransformer>(genericPattern);endpointRouteBuilder.MapControllerRoute(name:"GenericUrl",pattern:"{genericSeName}",defaults:new{controller="Common",action="GenericUrl"});endpointRouteBuilder.MapControllerRoute(name:"GenericUrlWithParameter",pattern:"{genericSeName}/{genericParameter}",defaults:new{controller="Common",action="GenericUrl"});endpointRouteBuilder.MapControllerRoute(name:"Product",pattern:$"{lang}/{constProducts}/{{SeName}}",defaults:new{controller="Product",action="ProductDetails"});endpointRouteBuilder.MapControllerRoute(name:"Category",pattern:$"{lang}/{constCategories}/{{SeName}}",defaults:new{controller="Catalog",action="Category"});endpointRouteBuilder.MapControllerRoute(name:"Manufacturer",pattern:$"{lang}/{constManufacturers}/{{SeName}}",defaults:new{controller="Catalog",action="Manufacturer"});endpointRouteBuilder.MapControllerRoute(name:"Vendor",pattern:genericPattern,defaults:new{controller="Catalog",action="Vendor"});endpointRouteBuilder.MapControllerRoute(name:"NewsItem",pattern:genericPattern,defaults:new{controller="News",action="NewsItem"});endpointRouteBuilder.MapControllerRoute(name:"BlogPost",pattern:genericPattern,defaults:new{controller="Blog",action="BlogPost"});endpointRouteBuilder.MapControllerRoute(name:"Topic",pattern:genericPattern,defaults:new{controller="Topic",action="TopicDetails"});endpointRouteBuilder.MapControllerRoute(name:"ProductsByTag",pattern:genericPattern,defaults:new{controller="Catalog",action="ProductsByTag"});}#endregion#region Properties/// <summary>/// Gets a priority of route provider/// </summary>/// <remarks>/// it should be the last route. we do not set it to -int.MaxValue so it could be overridden (if required)/// </remarks>publicintPriority=>-1000000;#endregion}}
Aggiunta metodi frmt() di utilità nelle viste per restituire decimali in Nop.Web\Extensions\HtmlExtensions.cs:
/// Restituisce (come stringa) il numero decimale specificato inserendo il punto/// ogni tre cifre. I numeri decimali sono limitati a 2/// </summary>/// <param name="val">Un decimal</param>/// <returns>Il numero nella forma mmm.kkk.uuu,dd</returns>publicstaticstringfrmt(thisdecimalval){varci=newCultureInfo("it-IT");ci.NumberFormat.NumberDecimalDigits=2;returnval.ToString("N",ci);}/// Restituisce (come stringa) il numero intero specificato inserendo il punto/// ogni tre cifre./// </summary>/// <param name="val">Un decimal</param>/// <returns>Il numero nella forma mmm.kkk.uuu,dd</returns>publicstaticstringfrmt(thisintval){varci=newCultureInfo("it-IT");ci.NumberFormat.NumberDecimalDigits=2;returnval.ToString("N",ci);}
Nel modello del prodotto in Nop.Web\Models\Catalog\ProductDetailsModel.cs aggiungere:
#region WEBMOBILI/// <summary>/// Nella nostra struttura c'è sempre un solo manufacturer per prodotto. Questa property lo restituisce./// In caso di manufacturer non settato (errore di dati) restituisce un manu vuoto per evitare una NullPointerException/// </summary>publicManufacturerBriefInfoModelManufacturer{get{if(ProductManufacturers.Count>0){returnProductManufacturers[0];}returnnewManufacturerBriefInfoModel{Name="",SeName="",IsActive=false};}}publicstringShopCity{get;set;}publicdecimalAdditionalShippingCharge{get;set;}#endregion
ProductController: al momento dichiarata l'istanza dell'interfaccia IWMCoreModelFactory, ma non utilizzata, i campi necessari sono stati aggiunti direttamente nel modello del prodotto, aggiungiamo quindi solo questa istruzione nel metodo ProductDetails(int productId, int updatecartitemid = 0):
#region WEBMOBILImodel.AdditionalShippingCharge=product.AdditionalShippingCharge;// spese di spedizione da stampare in frontend#endregion
Nella vista del prodotto, copiare la vista del tema base Nop.Web\Views\Product\_DeliveryInfo.cs in Nop.Web\Themes\Brooklyn\Views\Product\_DeliveryInfo.cs e modificarla così:
All'interno della action SubscribeNewsletter di Presentation\Nop.Web\Controllers\NewsletterController.cs aggiungiamo la chiamata alle API di 4Dem per registrare il cliente nella nostra lista.
Sembra che nella backoffice non ci sia la gestione dei meta title e description per le pagine HP e HP-Cataloghi.
Modificare la vista Presentation\Nop.Web\Themes\Pacific\Views\Shared\_Root.Head.cshtml commentando i meta title e description e sostituendo questo
@{
stringcurrentpage=webhelper.GetThisPageUrl(true);
}
@if(currentpage=="https://localhost:44353/"||currentpage=="https://shop.designbest.com/"||currentpage=="https://shop.dbdemo47.com/"){
<title>DesignbestShop|L'e-commercedeldesign</title><metaname="description"content="Il meglio del design è in offerta su Shop Designbest: trova l'arredamento per la tua casa e acquista a prezzi scontati e con pronta consegna."/>}
elseif(currentpage.EndsWith("/manufacturer/all")){
<title>DesignbestShop|Icataloghideimiglioribrand</title><metaname="description"content="I prodotti delle migliori marche sono in offerta su Shop Designbest. Sfoglia i cataloghi di arredamento e finiture d’interni e acquista a prezzi scontati."/>}
else{
<title>@Html.NopTitle()</title><metaname="description"content="@(Html.NopMetaDescription())"/>}
Per cambiare l'immagine in alto a sinistra bisogna sovrascriverla qui P:\DesignbestCommerce3\Presentation\Nop.Web\wwwroot\css\admin\images per 2 versioni del menu(compatto e non) logo.png 250x57 e logo-mini.png
Nascondere il pulsante Visualizza nei best seller(un Vendor non deve entrare nella pagina di modifica del prodotto lato NOP), bisogna commentare l'ultima ColumnProperty in queste 2 viste:
Nop.Web\Areas\Admin\Views\Home\_BestsellersBriefReportByAmount.cshtml e
Nop.Web\Areas\Admin\Views\Home\_BestsellersBriefReportByQuantity.cshtml
Nascondere il filtro Magazzino (aggiungere la classe d-none), altrimenti un vendor potrebbe vedere le vendite degli altri vendor, vista da modificare Nop.Web\Areas\Admin\Views\Order\List.cshtml.
Nel box dove sono elencati i prodotti, il link del prodotti rimanderà alla scheda del prodotto nel frontend, mentre solo se siamo Admin entreremo nell'edit del prodotto di NOP modificare in Nop.Web\Areas\Admin\Views\Order\_OrderDetails.Products.cshtml
Dobbiamo recuperare il VendorID del dropship di Webmobili:
<em>@if(!Model.IsLoggedInAsVendor){<aasp-controller="Product"asp-action="Edit"asp-route-id="@item.ProductId">@item.ProductName</a>}else{<ahref="@Url.RouteUrl("Product", new { SeName = item.ProductSeoName })"target="_blank">@item.ProductName</a>}</em>
Se il vendorID è quello di Webmobili-dropship mostro il pulsante CLONA e ASSEGNA a RIVENDITORE. Attenzione il metodo è cambiato da code>prodService.GetProductById(item.ProductId).VendorId a GetProductByIdAsync:
Il pulsante CLONA e ASSEGNA a RIVENDITORE' apre un modale in cui selezionare il rivenditore, innanzitutto dobbiamo creare la vista/componente del modale ProductToVendorModal. Creiamo il componente in Nop.Web\Areas\Admin\Components\ProductToVendorModal.cs così:
Torniamo nella pagina contenitore di dettaglio dell'ordine in Nop.Web\Areas\Admin\Views\Order\Edit.cshtml e inseriamo al fondo la chiamata al nostro component modale appena creato con questa riga di codice:
Durante il test di acquisto di prodotto DesignbestShop, in fase di selezione della spedizione
non ci sono opzioni e rimane lì e non avanza, probabilmente per assenza plugin spedizione.
Nel Libraries\Nop.Services\Messages\MessageTokenProvider.cs aggiungere i riferimenti ai servizi
IVendorService
IConfiguration
Nella property AllowedTokens aggiungere al fondo %Order.VendorDetail(s)%
//order tokens_allowedTokens.Add(TokenGroupNames.OrderTokens,new[]{"%Order.OrderNumber%","%Order.CustomerFullName%","%Order.CustomerEmail%","%Order.BillingFirstName%","%Order.BillingLastName%","%Order.BillingPhoneNumber%","%Order.BillingEmail%","%Order.BillingFaxNumber%","%Order.BillingCompany%","%Order.BillingAddress1%","%Order.BillingAddress2%","%Order.BillingCity%","%Order.BillingCounty%","%Order.BillingStateProvince%","%Order.BillingZipPostalCode%","%Order.BillingCountry%","%Order.BillingCustomAttributes%","%Order.Shippable%","%Order.ShippingMethod%","%Order.ShippingFirstName%","%Order.ShippingLastName%","%Order.ShippingPhoneNumber%","%Order.ShippingEmail%","%Order.ShippingFaxNumber%","%Order.ShippingCompany%","%Order.ShippingAddress1%","%Order.ShippingAddress2%","%Order.ShippingCity%","%Order.ShippingCounty%","%Order.ShippingStateProvince%","%Order.ShippingZipPostalCode%","%Order.ShippingCountry%","%Order.ShippingCustomAttributes%","%Order.PaymentMethod%","%Order.VatNumber%","%Order.CustomValues%","%Order.Product(s)%","%Order.CreatedOn%","%Order.OrderURLForCustomer%","%Order.PickupInStore%","%Order.OrderId%","%Order.VendorDetail(s)%"// custom token by Webmobili});
Nel metodo AdOrderTokensAsync aggiungere la riga
tokens.Add(newToken("Order.VendorDetail(s)",awaitVendorDetailsAsync(order,languageId),true));// custom token by Webmobili
E creare tutto il metodo VendorDetailsAsync
/// <summary>/// Custom by Webmobili/// </summary>/// <param name="order"></param>/// <param name="languageId"></param>/// <returns></returns>protectedvirtualasyncTask<string>VendorDetailsAsync(Orderorder,intlanguageId){//if (vendorId == 0) return "";varsb=newStringBuilder();// intestazionisb.AppendLine("<table border=\"0\" style=\"width:100%;\">");sb.AppendLine($"<tr style=\"background-color:{_templatesSettings.Color1};text-align:center;\">");sb.AppendLine($"<th>Prodotto</th>");sb.AppendLine($"<th>Negozio</th>");sb.AppendLine("</tr>");intvendorWMDropship=0;int.TryParse(_configurationService.GetSection("WMApplicationSettings")["DropshipVendorID"],outvendorWMDropship);varorderItems=await_orderService.GetOrderItemsAsync(order.Id);foreach(varordinorderItems){sb.AppendLine($"<tr style=\"background-color: {_templatesSettings.Color2};text-align: center;\">");varproduct=await_productService.GetProductByIdAsync(ord.ProductId);varvendor=await_vendorService.GetVendorByIdAsync(product.VendorId);varaddress=await_addressService.GetAddressByIdAsync(vendor.AddressId);varstateProvince=await_stateProvinceService.GetStateProvinceByIdAsync(address.StateProvinceId.Value);sb.AppendLine($"<td style=\"padding: 0.6em 0.4em;text-align: left;\">{product.Name}</td>");if(vendorWMDropship!=vendor.Id){sb.AppendLine($"<td style=\"padding: 0.6em 0.4em;text-align: left;\">{vendor.Name} - {address.Address1}, {address.City} ({stateProvince.Abbreviation})<br/>Email: <a href=\"mailto:{vendor.Email}\">{vendor.Email}</a> \t Telefono: {address.PhoneNumber}</td>");}else{sb.AppendLine($"<td style=\"padding: 0.6em 0.4em;text-align: left;\">{vendor.Name}, a breve riceverai l'informazione del negozio di riferimento per il tuo ordine.<br/>Email: <a href=\"mailto:{vendor.Email}\">{vendor.Email}</a> \t Telefono: {address.PhoneNumber}</td>");}sb.AppendLine("</tr>");}sb.AppendLine("</table>");returnsb.ToString();}#endregion
Nella WriteTotalsAsync aggiungere il parametro opzionale int vendorId = 0 e una region iniziale
protectedvirtualasyncTaskWriteTotalsAsync(Orderorder,Languagelanguage,StringBuildersb,intvendorId=0){#region Costi spedizione per negozio e sconto sul totaleif(vendorId!=0){order.OrderSubtotalInclTax=0;order.OrderSubtotalExclTax=0;order.OrderShippingInclTax=0;// azzero perché lo calcolo parziale per il vendor selezionatoorder.OrderShippingExclTax=0;order.OrderTotal=0;varorderItems=await_orderService.GetOrderItemsAsync(order.Id);foreach(varordinorderItems){varproduct=await_productService.GetProductByIdAsync(ord.ProductId);if(product.VendorId==vendorId){if(order.CustomerTaxDisplayType==TaxDisplayType.IncludingTax){order.OrderSubtotalInclTax+=(product.Price*ord.Quantity);order.OrderShippingInclTax+=product.AdditionalShippingCharge;}else{order.OrderSubtotalExclTax+=(product.Price*ord.Quantity);order.OrderShippingExclTax+=product.AdditionalShippingCharge;}order.OrderTotal+=(product.Price*ord.Quantity)+product.AdditionalShippingCharge;}}//Applichiamo eventuale sconto all'ordineorder.OrderTotal-=order.OrderSubTotalDiscountInclTax;}#endregion//...
Nella ProductListToHtmlTableAsync(Order order, int languageId, int vendorId) modificare la chiamata alla WriteTotalAsync passando anche il vendorId. Togliere if(vendorId == 0) come di seguito
//if (vendorId == 0)//{//we render checkout attributes and totals only for store owners (hide for vendors)if(!string.IsNullOrEmpty(order.CheckoutAttributeDescription)){sb.AppendLine("<tr><td style=\"text-align:right;\" colspan=\"1\"> </td><td colspan=\"3\" style=\"text-align:right\">");sb.AppendLine(order.CheckoutAttributeDescription);sb.AppendLine("</td></tr>");}//totalsawaitWriteTotalsAsync(order,language,sb,vendorId);//}// ....
Con il dropshipping si rende necessario aggiungere un nuovo template di messaggi.
In Libraries\Nop.Core\Domain\Messages\MessageTemplateSystemNames.cs aggiungere il nuovo nome (dopo OrderPaidCustomerNotification)
#region Webmobili/// <summary>/// Represents system name of notification customer about paid order after a dropshipping sale./// </summary>publicconststringOrderPaidDropshipCustomerNotification="OrderPaid.DropShipCustomerNotification";#endregion
Per creare la logica di spedizione, prima aggiungiamo il metodo nell'interfaccia in Libraries\Nop.Services\Messages\IWorkflowMessageService.cs (dopo SendOrderPaidCustomerNotification)
#region WEBMOBILI/// <summary>/// Sends an order paid notification to a customer after a dropshipping sale./// </summary>/// <param name="order">Order instance</param>/// <param name="languageId">Message language identifier</param>/// <param name="attachmentFilePath">Attachment file path</param>/// <param name="attachmentFileName">Attachment file name. If specified, then this file name will be sent to a recipient. Otherwise, "AttachmentFilePath" name will be used.</param>/// <returns>Queued email identifier</returns>Task<IList<int>>SendOrderPaidDropshipCustomerNotificationAsync(Orderorder,intlanguageId,stringattachmentFilePath=null,stringattachmentFileName=null);#endregion
e l'implementazione in Libraries\Nop.Services\Messages\WorkflowMessageService.cs
A questo punto è necessario aggiungere via SQL il messaggio (comprensivo di token) alla tabella MessageTemplate
INSERTINTO[MessageTemplate]([Name],[BccEmailAddresses],[Subject],[Body],[IsActive],[DelayBeforeSend],[DelayPeriodId],[AttachedDownloadId],[EmailAccountId],[LimitedToStores])VALUES('OrderPaid.DropShipCustomerNotification',NULL,'%Store.Name% | Pagamento effettuato per l''ordine #%Order.OrderNumber%','Compilare il BODY',1,NULL,0,0,1,0)
Lato admin è necessario modificare il controller Presentation\Nop.Web\Areas\Admin\Controllers\OrderController.cs in modo che chiami la nuova funzione quando necessario.
Aggiungere i seguenti Services:
ICopyProductService
IVendorService
LocalizationSettings
Dopo il metodo(AddProductToOrderDetails), aggiungere:
#region DROPSHIPPINGpublicvirtualasyncTask<IActionResult>CopyAndSetProductWMtoVendor(intproductId,intvendorId,intorderItemId){if(!await_permissionService.AuthorizeAsync(StandardPermissionProvider.ManageProducts))returnAccessDeniedView();varorderId=0;//var copyModel = new CopyProductModel { CopyImages = true, Published = false, Name = "prodotto_" + productId }; //model.CopyProductModel;try{varoriginalProduct=await_productService.GetProductByIdAsync(productId);// Clonazione prodotto dell'ordine varnewProduct=await_copyProductService.CopyProductAsync(originalProduct,originalProduct.Name,false,#if DEBUGfalse#elsetrue#endif);// false = publish, true = copyImagesnewProduct.Sku=originalProduct.Sku+"-"+newProduct.Id;// nuovo SKU con presiffo del prodotto originalenewProduct.Name=originalProduct.Name+" #";newProduct.StockQuantity=0;newProduct.VisibleIndividually=true;newProduct.VendorId=vendorId;// aggiorniamo il Vendor a quello scelto dalla tendinaawait_productService.UpdateProductAsync(newProduct);// Recuperiamo i dettagli del OrderItem in cui si trova il prodotto da clonarevartmpOrderItem=await_orderService.GetOrderItemByIdAsync(orderItemId);tmpOrderItem.ProductId=newProduct.Id;// IMPORTANTE!!! aggiornare il productId dell' orderitem con il productId del nuovo prodotto clonatoawait_orderService.UpdateOrderItemAsync(tmpOrderItem);orderId=tmpOrderItem.OrderId;// INVIO EMAIL ORDINE AL RIVENDITORE OrdercurrentOrder=await_orderService.GetOrderByOrderItemAsync(orderItemId);VendornewVendor=await_vendorService.GetVendorByIdAsync(vendorId);// Controllo se ordine è già stato pagato tramite Paypal o Stripe// In base a questo decido il template della mailswitch(currentOrder.PaymentMethodSystemName){case"Payments.CheckMoneyOrder":await_workflowMessageService.SendOrderPlacedVendorNotificationAsync(currentOrder,newVendor,_localizationSettings.DefaultAdminLanguageId);break;case"FoxNetSoft.StripeDirect":case"Payments.PayPalSmartPaymentButtons":await_workflowMessageService.SendOrderPaidVendorNotificationAsync(currentOrder,newVendor,_localizationSettings.DefaultAdminLanguageId);await_workflowMessageService.SendOrderPaidDropshipCustomerNotificationAsync(currentOrder,_localizationSettings.DefaultAdminLanguageId);break;}}catch(Exceptionexc){_notificationService.ErrorNotification(exc.Message);}returnRedirectToAction("Edit","Order",new{id=orderId});}#endregion
Per aggiungere i link a Designbest e al Magazine modificare la vista \Plugins\Nop.Plugin.Compiled\SevenSpikes.Nop.Plugins.MegaMenu\Views\Components\MegaMenu\MegaMenu.cshtml aggiungendo all'elemento
Payments.CheckMoneyOrder (da Configurazione/Plugins Locali) il nome amichevole del plugin viene utilizzato in message template delle email, si rende necessario modificare il nome con l'esatta stringa